As a Solutions Architect, my terminal is central to my workflow. Here’s how I set up my terminal using Oh My Zsh to boost my productivity and enhance my experience.
Step 0: You’re gonna need a bigger font
My prompt makes use of symbols to help convey meaning. e.g. the directory location has a 📁 prefix, the git stats has a git emoji, etc. These aren’t included in fonts by default - so we need to install a font with these augmented.
The new Monaspace font from GitHub is 🔥. Thankfully, it has been patched with a bunch of the Nerd Font symbols, so I can use it in VSCode and in my terminal. Nerd Fonts have slightly different names for the patched fonts, and personally, I like the Krypton variant - so I use MonaspiceKr Nerd Font Mono. You first install all the variants from Nerd Fonts.
brew tap homebrew/cask-fonts
brew install --cask font-monaspace-nerd-font
Then you select it in your terminal app.
Side note: if you want to use this font for VS Code and you aren’t seeing any ligatures, you will need to tweak your settings.json:
- In VSCode, press F1
- Select
Preferences: Open User Settings (JSON)
Usual setup for ligatures:
{
	...
  "editor.fontFamily": "CaskaydiaCove Nerd Font",
  "editor.fontLigatures": true,
	...
}
To get it working with Monaspice in VSCode:
{
	...
  "editor.fontFamily": "MonaspiceKr Nerd Font",
  "editor.fontLigatures": "'calt', 'liga', 'dlig', 'ss01', 'ss02', 'ss03', 'ss04', 'ss05', 'ss06', 'ss07', 'ss08'",
	...
}
Step 1: Installing Oh My Zsh with Antigen
Installing Oh My Zsh
This has been covered in my Mac setup guide, but the command is just a shell script.
sh -c "$(curl -fsSL https://raw.github.com/ohmyzsh/ohmyzsh/master/tools/install.sh)"There are a few ways of adding OMZ plugins, most of them tend to be cloning git repos - which makes things a little hard to update/manage. Why Antigen? It makes it easy to add themes/plugins since I just need to reference them (using antigen) in my config file, and antigen does the rest. It will auto install anything missing, so it makes it easy to transplant settings from one machine to another. (Note: I later improved my terminal startup by moving from Antigen to Zinit, cutting load time by 81%.)
Install Antigen
First, ensure you have Homebrew installed. Then, run:
brew install antigenConfigure Oh My Zsh with Antigen
Add this to your .zshrc:
source $(brew --prefix)/share/antigen/antigen.zsh

antigen use oh-my-zsh
Step 3: Setting Up the Theme
I use romkatv/powerlevel10k for its speed and customization.
Install the Theme - your .zshrc should look something like:
# Path to your oh-my-zsh installation.
export ZSH="$HOME/.oh-my-zsh"

# Manage Oh-My-Zsh plugins with Antigen
source $(brew --prefix)/share/antigen/antigen.zsh

antigen use oh-my-zsh

antigen theme romkatv/powerlevel10k

antigen apply
Configuring the Prompt - run p10k configure
This is requried so that it looks right on YOUR machine. I like to select ‘transient prompt’.
If you need to tweak it more than the config tool does out of the box, I recommend going in and modifying ~/.p10k.zsh manually. I’ve gone in and tweaked which elements are shown in the left/right sides of my prompt.
Current config looks like:
  ... omitted for brevity ...

  # The list of segments shown on the left. Fill it with the most important segments.
  typeset -g POWERLEVEL9K_LEFT_PROMPT_ELEMENTS=(
    # =========================[ Line #1 ]=========================
    os_icon                 # os identifier
    dir                     # current directory
    vcs                     # git status
    # =========================[ Line #2 ]=========================
    newline                 # \n
    prompt_char             # prompt symbol
  )

  # The list of segments shown on the right. Fill it with less important segments.
  # Right prompt on the last prompt line (where you are typing your commands) gets
  # automatically hidden when the input line reaches it. Right prompt above the
  # last prompt line gets hidden if it would overlap with left prompt.
  typeset -g POWERLEVEL9K_RIGHT_PROMPT_ELEMENTS=(
    # =========================[ Line #1 ]=========================
    status                  # exit code of the last command
    command_execution_time  # duration of the last command
    azure                   # azure account name (https://docs.microsoft.com/en-us/cli/azure)
    dotnet_version          # .NET version (https://dotnet.microsoft.com)
    node_version            # node.js version
    background_jobs         # presence of background jobs
    direnv                  # direnv status (https://direnv.net/)
    # =========================[ Line #2 ]=========================
    newline
  )

  ... omitted for brevity ...
Step 5: Syntax highlighting
Why Syntax Highlighting? It makes your terminal code easier to read and understand, highlighting commands, arguments, and errors in different colors. Add this to your .zshrc:
antigen bundle zsh-users/zsh-syntax-highlightingConfiguring Syntax Highlighting
Once installed, it works right away. If you want to customize the colors:
I have left my colors alone, but if you want to customize them, edit your .zshrc file.
For example:
ZSH_HIGHLIGHT_STYLES[command]='fg=blue,bold'
ZSH_HIGHLIGHT_STYLES[argument]='fg=cyan'
ZSH_HIGHLIGHT_STYLES[error]='fg=red,underline'
This will make commands blue and bold, arguments cyan, and errors red and underlined.
Step 6: Managing Node Versions
I use nvm to keep all the different Node version separated from other client projects. lukechilds/zsh-nvm lets me do this automatically when I cd into a directory.
Install: Add to .zshrc:
export NVM_AUTO_USE=true
antigen bundle lukechilds/zsh-nvm
Step 6: Replacing ls with eza
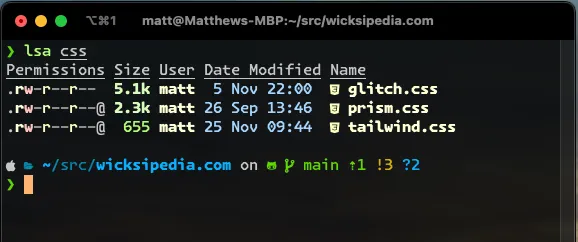
eza offers a nicer experience with icons.
Install eza: Use Homebrew:
brew install ezaConfigure Alias: Add to .zshrc:
alias ls='eza --icons'Step 7: Setting Up Aliases
Git Aliases: Oh My Zsh has great ones built-in. .NET Development:
alias d='dotnet'
alias db='dotnet build'
alias dw='dotnet watch'
alias dt='dotnet test'
Conclusion
With Oh My Zsh, Antigen, and some choice aliases, my terminal is not just a tool, but a tailored environment that boosts my productivity and makes development more enjoyable.
Update: This setup has since evolved significantly. I migrated from Antigen to Zinit, replaced Powerlevel10k with Starship, swapped nvm for fnm, and added several new tools. See my current Zsh setup for what I run now.